
Dodeca: adding a button to a toolbar
- Kevin Corlett
- Nov 20, 2018
- 3 min read
Updated: Dec 4, 2018
Dodeca is a great tool for Essbase users. If you ask any Dodeca customer about the impact that Dodeca has had on their organization, they would describe how the software has helped save time and money saving in delivering real world solutions for their users. Dodeca customers are usually not just users of the tool, they are enthusiastic advocates!

The Wysent team has extensive expertise with Dodeca built on a strong relationship with the Applied OLAP team going back many years, and we would like to share some of that expertise with an occasional blog post on Dodeca techniques. This post will describe the steps to perform a common bit of functionality in a Dodeca application: adding a button to a toolbar.
Steps to Add a Toolbar
Toolbars are fully customizable in Dodeca, and you can add buttons to enhance the functionality of your applications. For example, you can add a button to navigate to another View, to perform a SQL or Essbase action, or call a Workbook Script (WBS) procedure. Let’s look at a simple example of adding a button that calls a WBS procedure. This takes just a few steps:
Create the button tool on the Toolbar Configuration used with the View.
Place the new button on the toolbar.
Assign the button tool with the instructions we would like it to perform
To add a new tool to a toolbar, go to the Toolbars Configuration editor and click on the “Toolbars Designer…” button:

Click on Toolbars Designer… button
This will start the Toolbars Designer for this toolbar In the Toolbars Designer, we have multiple tabs across the top. Click on the Tools tab, and then click New… at the bottom to create a new tool:

Click on the Tools tab, then click New…
In the New Tool dialogue, select Button as the Tool type, and enter a descriptive title in both the Caption and the Key fields. We can leave the Category field empty right now. Click Add and Close.

Click Add to add the toolbar, then click close.
Next click on the Toolbars Designer tab. Here we can add tools from our list to the toolbar so it shows up when the view is displayed. If you click on the Toolbar drop down box, you will see the 4 categories that exist on this toolbar: Essbase, Grid, Standard and View:

The toolbars listed in the Toolbar Designer tab
These are listed alphabetically, not in the order in which they actually appear in the toolbar. The Grid category is the rightmost category on the toolbar, so that is where we will place our new tool. Select Grid from the dropdown, then select our new tool and drag it to the left, just under the Sheets member of the Grid category. Let’s also add a divider also by right clicking on our new tool and selecting Begin Group:

Add the new tool to the Grid toolbar via drag and drop, then Begin a Group
Click on Close at the bottom of the dialog. In the Toolbars Preview, we should now see our new tool added to the toolbar, with a little divider separating it from the Sheets tool:

The new tool can be seen in the Toolbars Preview
Our last step is to now assign the proper actions to our new button. For that, we click on the Configure Tools… button in the metadata editor:
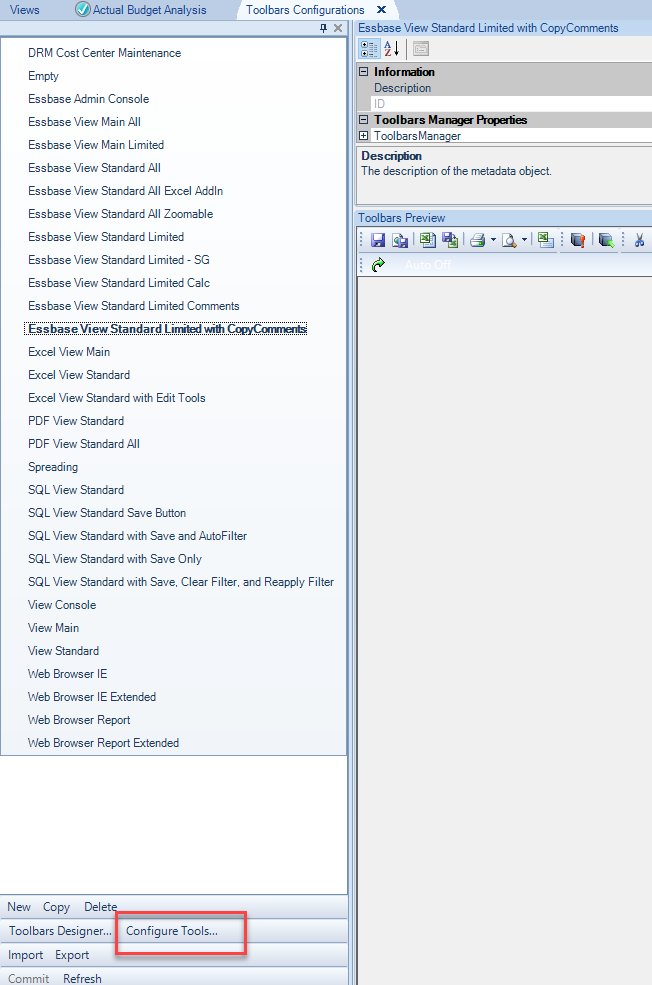
Click on Configure Tools to assign an action to the new button tool
This will bring up the Configure Tools dialog. Click our new tool from the list of tools so we can map it to a Tool Controller. On the right side of the dialog, click on the tool controller drop down, then select WorkbookScriptToolController:

Select the tool, then click on the Tool Controller dropdown
Once selected, the Arguments window will be filled. We only need to enter the WorkbookScriptID and ProcedureName arguments. Select the dropdown for the WorkbookScriptID and select the correct workbook script ID, then select the ProcedureName. The only procedure we have in the script is CopyComments. Once those updates are made, click on the Commit Module, Toolbars Configuration, and/or Views button at the bottom center of the dialog. This will bring up a confirmation message.
The View now has the updated toolbar to perform a specific function defined in a WBS. Good stuff!
Comments